Welcome to our tutorial on how to build an intermediate switch circuit! This circuit is a bit more advanced than some of the others we’ve covered, but don’t worry – we’ll walk you through every step of the process. To get started, you’ll need to gather a few tools and materials. You’ll need a steel rule, plier, awl, tester, combination plier, cable insulation knife, mallet, and a screw driver. In terms of materials, you’ll need an intermediate switch, two-way switches, batten holders, sunk boxes, round blocks, red and blue wires, and bulbs. Once you have everything on hand, it’s time to get started. We’ll begin by preparing a wiring diagram and drawing it on the board with the right measurements.

Layout diagram
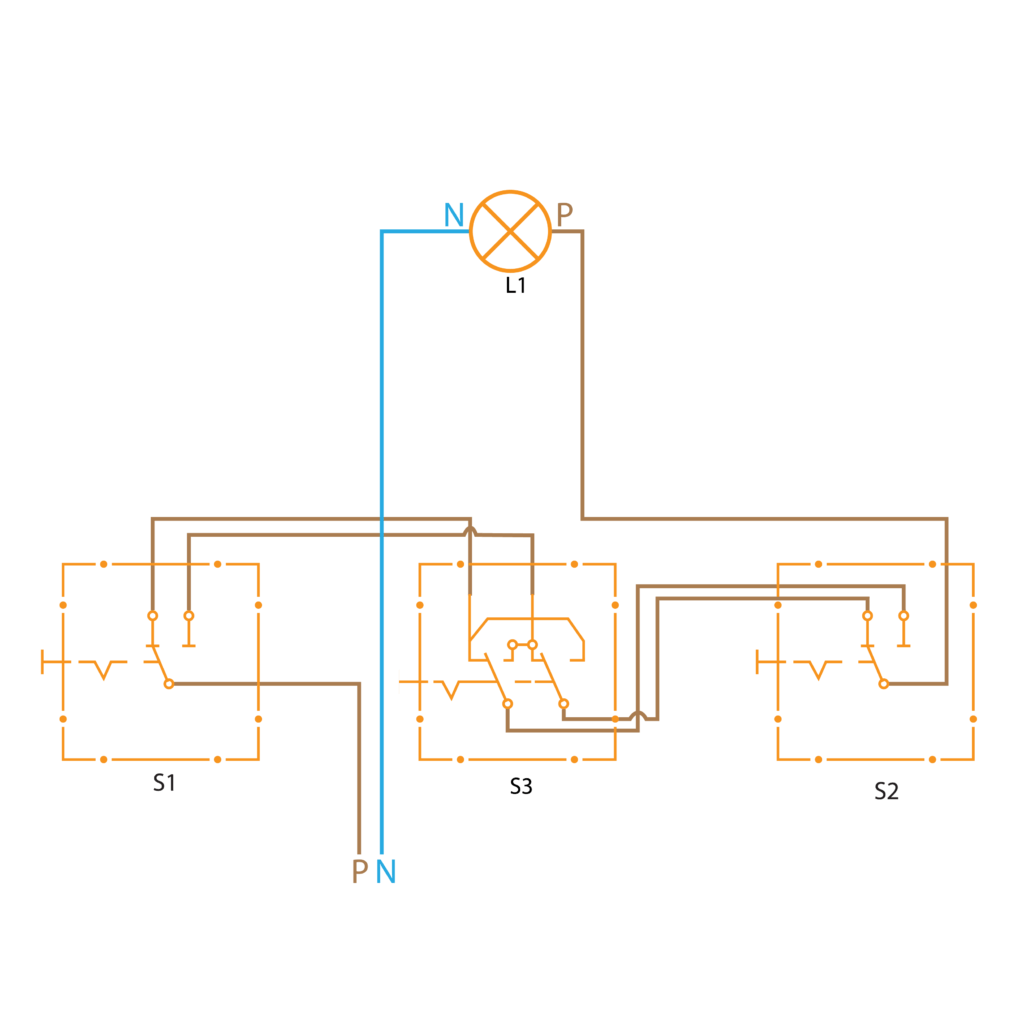
Wiring diagram
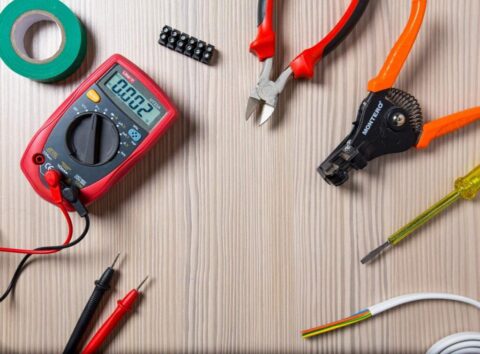
Equipment and tools: Steel rule, plier, awl, tester, combination plier, cable insulation knife, mallet, screw driver
Items
- Intermediate switch 01 no’s
- Two way switch 02 no’s
- Batten Holder 01 no’s
- Sunk Box 03 no’s
- Round Block 01
- 1/1.3 Red Wire
- 1/1.3 Blue Wire
- Bulbs 01
Procedure: Prepare the wiring diagram according to the layout diagram and draw on the board with the right measurements. Set 1 ½ and 1 ¼ clips according to the number of wires. Then, set 1/1.3 red wire and 1/1.3 blue wire on the board. Then, set the PVC sunk box and round box. Fix the intermediate switch in the middle and two-way switches behind and make the circuit. Check the circuit by a multi-meter and give power supply. You can now switch on the L bulb through S1, S2, S3 switches and the bulb that is lit from S1 can be switches off from S2 and S3
Conclusion: The circuit activated properly